Quickstart guide#
If you’ve completed the Installation section and were able to run the ASIC Demo, you will have completed a simple remote run through an ASIC design flow!
In the following sections, you will find more details about the design, the flow and the results of the run.
Design Details#
The simple design that was used in the demo target is a single clock cycle pulse (“heartbeat”) generated by a counter. You can see the design here: heartbeat.v.
Run Setup#
SiliconCompiler includes a Python API to simplify the hardware compilation flow process. The following code snippet below shows how the demo design was loaded in and run through the Python API.
#!/usr/bin/env python3

from siliconcompiler import ASIC, Design                   # import python package
from siliconcompiler.targets import skywater130_demo

if __name__ == "__main__":
    design = Design("heartbeat")                           # create design object
    design.set_topmodule("heartbeat", fileset="rtl")       # set top module
    design.add_file("heartbeat.v", fileset="rtl")          # add input sources
    design.add_file("heartbeat.sdc", fileset="sdc")        # add input sources
    project = ASIC(design)                                 # create project
    project.add_fileset(["rtl", "sdc"])                    # enable filesets
    skywater130_demo(project)                              # load a pre-defined target
    project.option.set_remote(True)                        # enable remote execution
    project.run()                                          # run compilation
    project.summary()                                      # print summary
    project.show()                                         # show layout
The following sub-sections will describe each line in more detail.
Project and Design Creation#
The hardware build flow centers around two main objects: the Design, which holds design-specific information, and the ASIC, which manages project settings and execution.
from siliconcompiler import ASIC, Design

design = Design("heartbeat")
project = ASIC(design)
Defining the Design#
Once the objects are created, we specify the design’s top module and add its source files. In this case, heartbeat.v is the Verilog RTL, and heartbeat.sdc is the Synopsys Design Constraints file, which defines the clock.
design.set_topmodule("heartbeat", fileset="rtl")
design.add_file("heartbeat.v", fileset="rtl")
design.add_file("heartbeat.sdc", fileset="sdc")
project.add_fileset(["rtl", "sdc"])
Loading a Target#
Next, we load a target, which bundles a Process Design Kit (PDK), standard cell libraries, and a pre-configured compilation flow.
from siliconcompiler.targets import skywater130_demo

skywater130_demo(project)
Configuring the Run#
Project.option() is used to configure various settings. Here, we set the [option,remote] parameter to True to execute the compilation job in the cloud.
If you were to remove this line, the job would run on your local machine.
project.option.set_remote(True)
Executing the Flow#
Finally, we execute the flow.
The Project.run() method starts the compilation, Project.summary() prints a table of results, and Project.show() opens the final layout in a viewer.
project.run()
project.summary()
project.show()
Run Flow#
Running this python script directly produces the same results as the ASIC Demo target.
python3 heartbeat.py
Remote Run Controls#
When your job starts on a remote server, it will log a job ID which you can use to query your job if you close the terminal window or otherwise interrupt the run before it completes:
| INFO | job0 | remote | 0 | Your job's reference ID is: 0123456789abcdeffedcba9876543210
You can use this job ID to interact with a running job using the sc-remote CLI app:
# Check on a job's progress.
sc-remote -jobid 0123456789abcdeffedcba9876543210

# Cancel a running job.
sc-remote -jobid 0123456789abcdeffedcba9876543210 -cancel

# Ask the server to delete a job from its active records.
sc-remote -jobid 0123456789abcdeffedcba9876543210 -delete

# Reconnect to an active job.
sc-remote -jobid 0123456789abcdeffedcba9876543210 -reconnect -cfg [build/design/jobname/import/0/outputs/design.pkg.json]
The sc-remote app also accepts a -credentials input parameter which works the same way as the [option,credentials] parameter.
Run Results#
Your run will first show the SiliconCompiler banner/info, followed by design INFO messages.
As the run goes through each step of the flow, a message will be printed to the screen every 30 seconds.
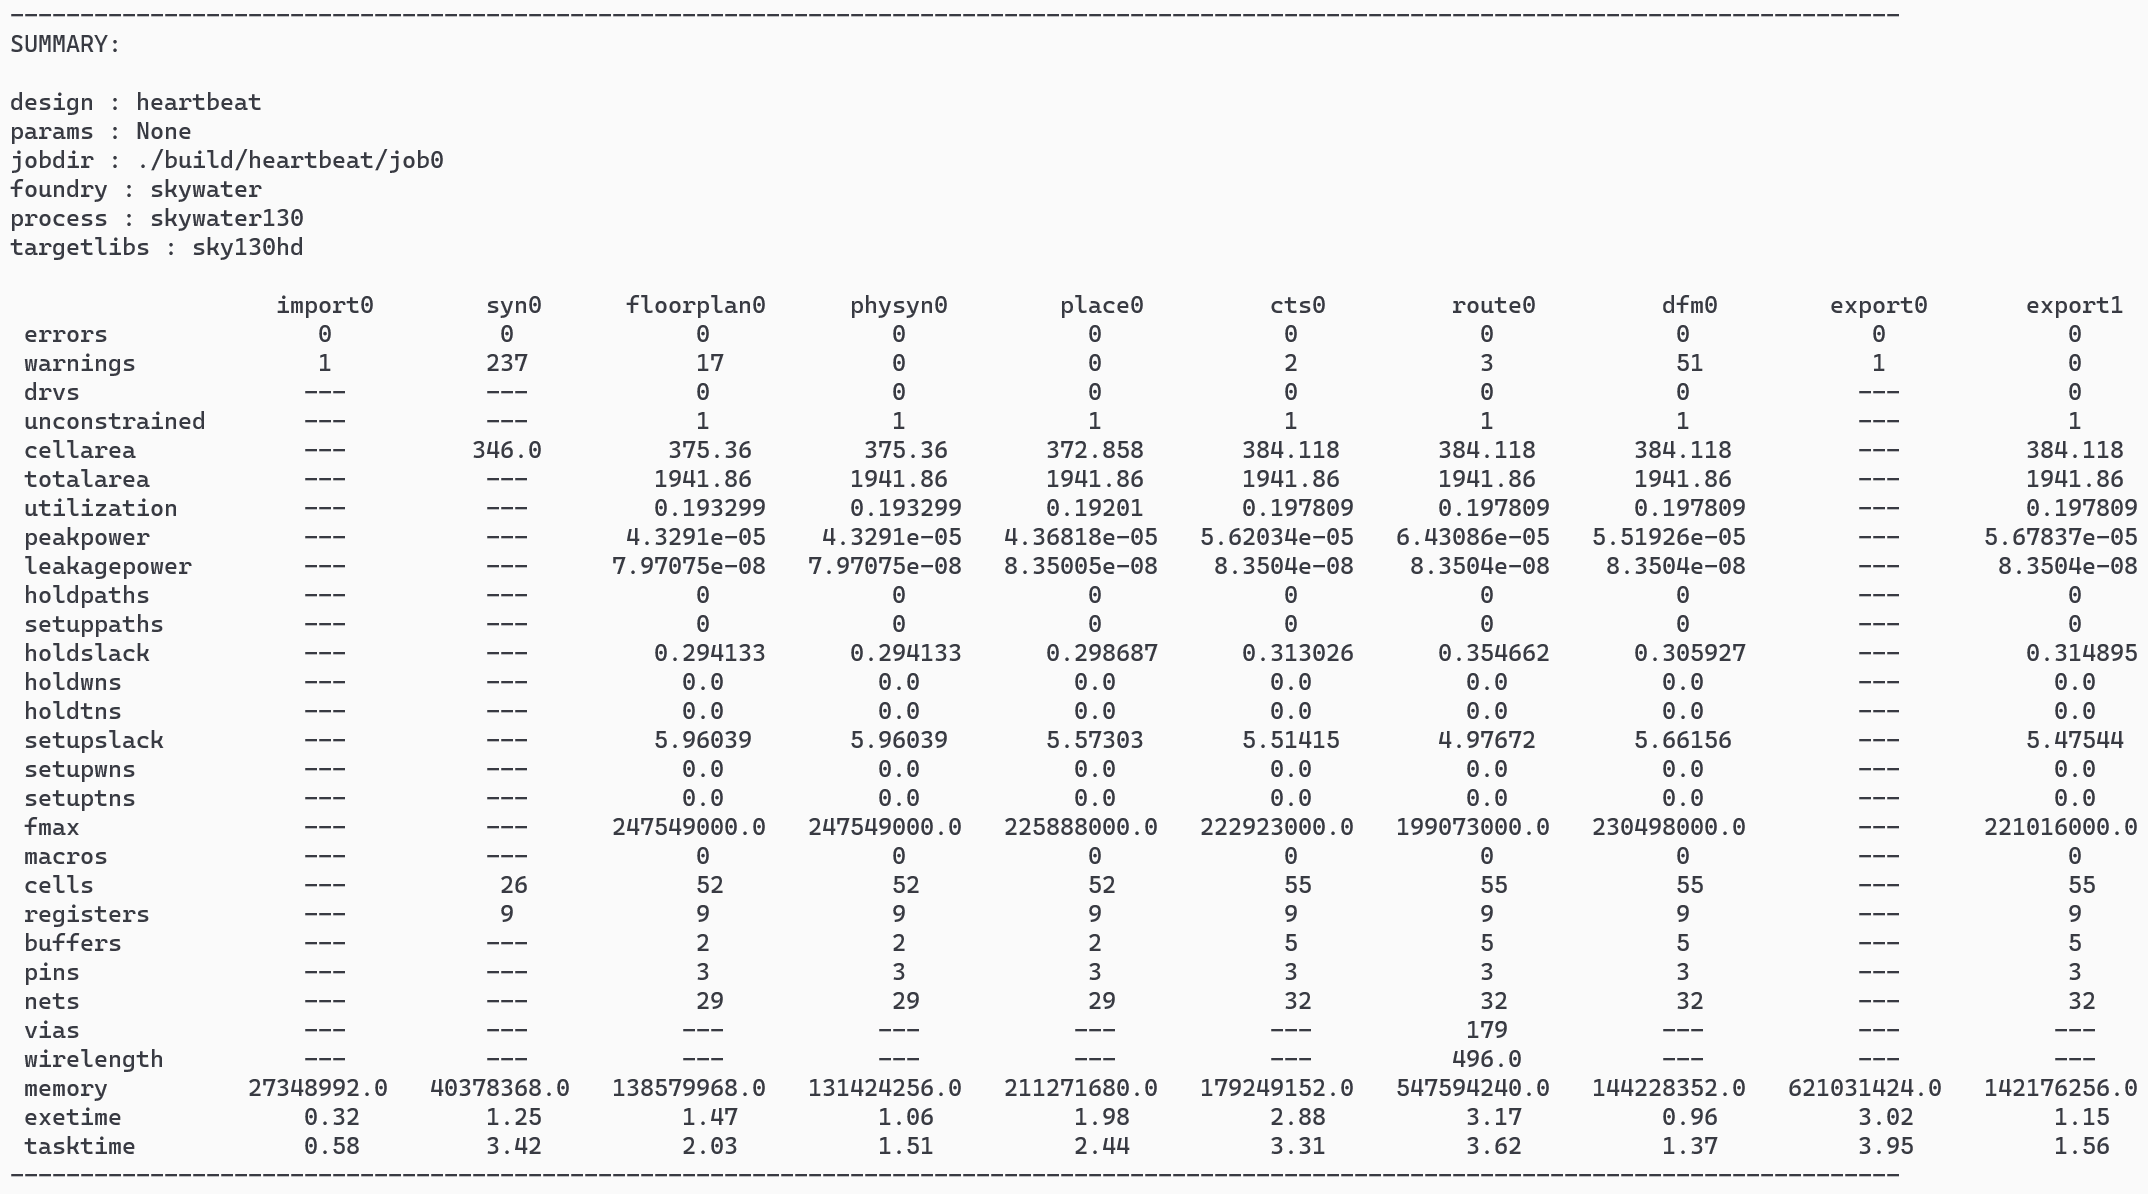
Then, at the end of the run, a summary table will be printed similar to the one shown below.
This table is generated by calling the Project.summary() function call in your python script above.
All design outputs are located in build/<design>/<jobname>.
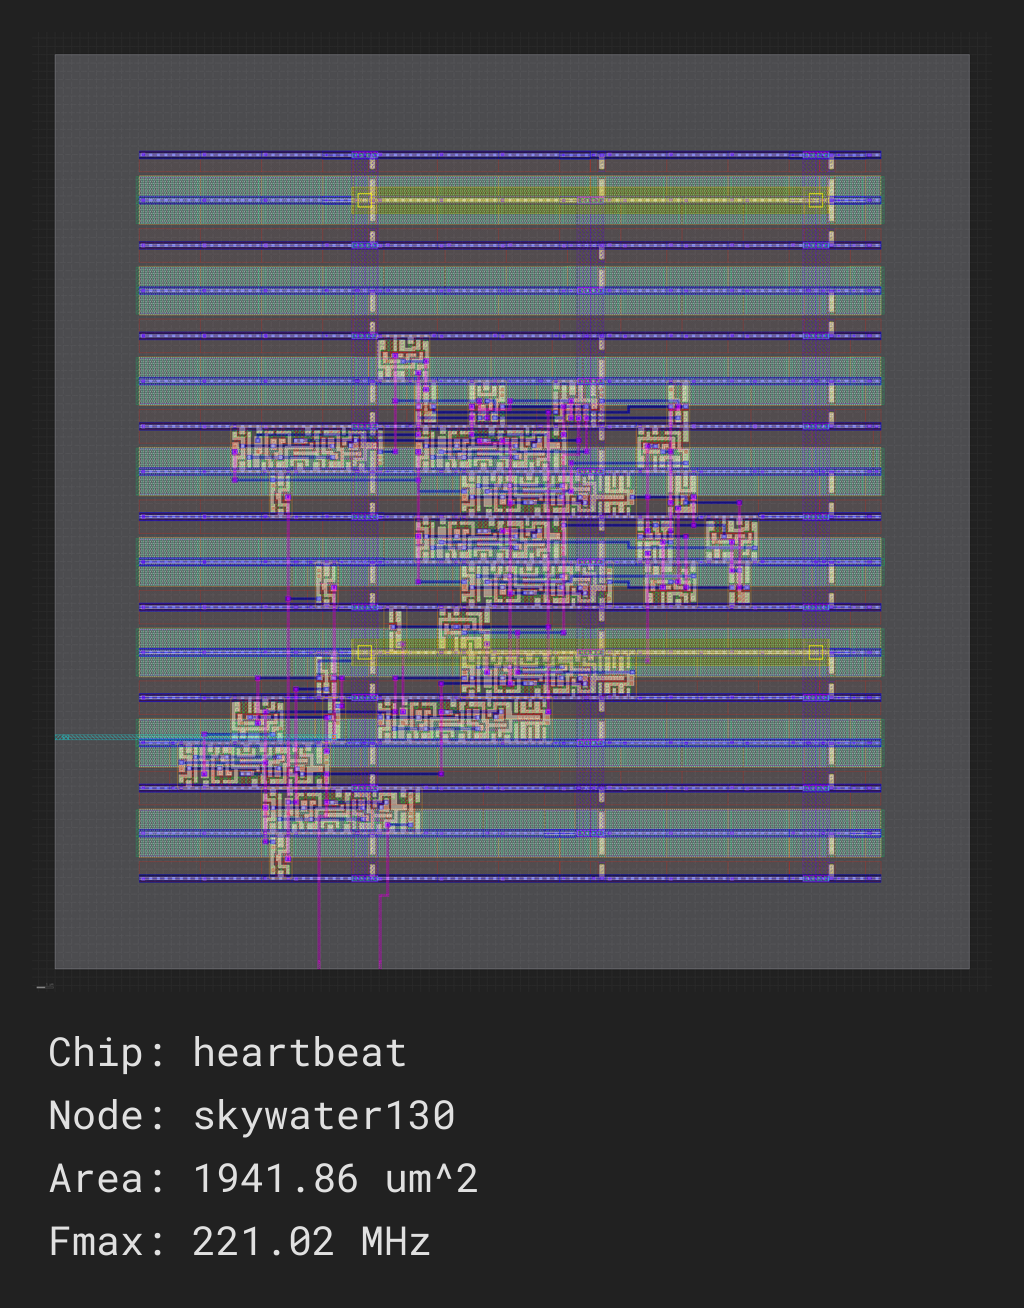
When running remote, you will not get all the tool-specific output that you would with a local run, but you will be able to find a screenshot of the demo design heartbeat.png:
Other Ways to Run#
The ASIC Demo was run in public beta server in the cloud. SiliconCompiler also supports running on private servers or also local runs on your own machine.
See docker to see details on how to use the SiliconCompiler docker image to run on tools on your local machine without needing to maintain the tools.
See remote processing to see details on how to run on a private server, and see external tools to see the additional tool installation requirements for running on your machine locally.
Local Run Results#
By default, only the summary of each step is printed, in order to not clutter up the screen with tool-specific output.
If you wish to see the output from each tool, you can find the log files associated with each tool in: build/<design>/<jobname>/<step>/<index>/<step>.log
If you wish to see all the tool-specific information printed onto the screen, you can turn the [option,quiet] option off.
View Design#
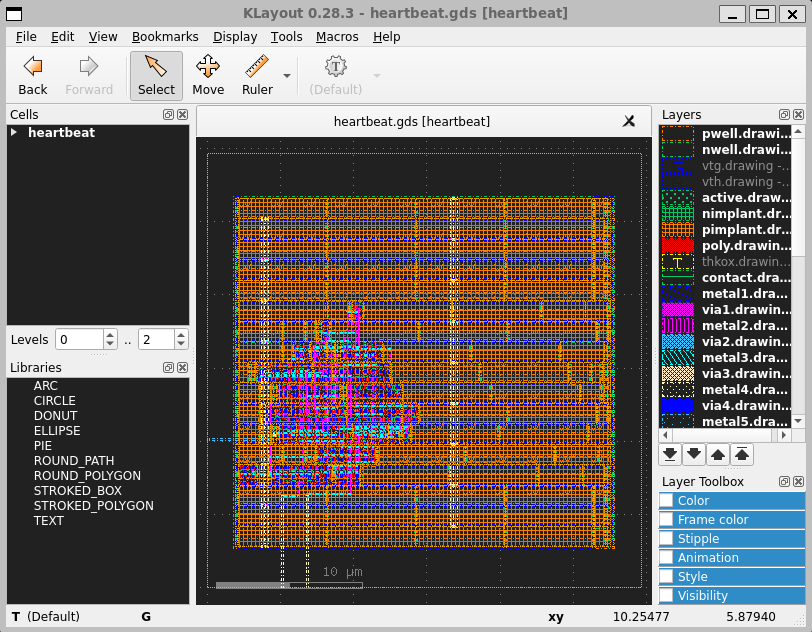
For viewing IC layout files (DEF, GDSII) we recommend installing the open source multi-platform Klayout viewer (available for Windows, Linux, and macOS). Installation instructions for Klayout can be found in the tools directory.
If you have Klayout installed, you can browse your completed design by calling sc-show directly from the command line as shown below:
(venv) sc-show -design heartbeat
If you want to have this window pop up automatically at the end of your script, you can add Project.show() to the end of your python script.
project.show() # pops open a window with the layout
What Next?#
Now that you’ve quickly run a simple example, you can proceed to a larger example like building your own soc, or you can dive deeper into the SiliconCompiler build flow you ran from this quickstart (asic_demo) by looking through how the flow is constructed with the Design and Compilation Data and Compilation Process in the Fundamentals section.